Run Stable Diffusion Locally on Mac
Stable Diffusion is an advanced text-to-image generation model developed by CompVis, a research group at Ludwig Maximilian University in Munich. It utilizes the principles of diffusion models to generate high-quality images based on user-provided text prompts.
Diffusion Bee is the easiest way to generate AI art on a local Mac with Stable Diffusion. Completely free of charge. Runs offline. No limits.
Diffusion Bee Features
- Full data privacy - nothing is sent to the cloud (unless an image is uploaded on purpose)
- Clean and easy to use UI with one-click installer
- Image to image
- Supported models : - SD 1.x, SD 2.x, SD XL, Inpainting, ControlNet, LoRA
- Download models from the app
- In-painting
- Out-painting
- Generation history
- Upscaling images
- Multiple image sizes
- Optimized for M1/M2 Chips
- Runs locally on your computer
- Negative prompts
- Advanced prompt options
- ControlNet
How to use DiffusionBee
This documentation is written for version 1.5.1. Parts of it may be unapplicable for other versions.
Installation
Download and start the application. On first launch, DiffusionBee will download and install additional data for image generation.
Updates
DiffusionBee occasionally receives updates to add new features and improve performance. When prompted on startup, re-download the application from the site, and replace the new file in the location of the old one. Your history and models will be saved.
Generating images
Depending on settings and available computing power it may take a few seconds to a few minutes to generate an image. Image generation may be aborted by pressing the stop button. Use the “save image” link to save the image to a location of your choice.
Clicking on an image opens a separate window displaying the image in full size.
Text to image
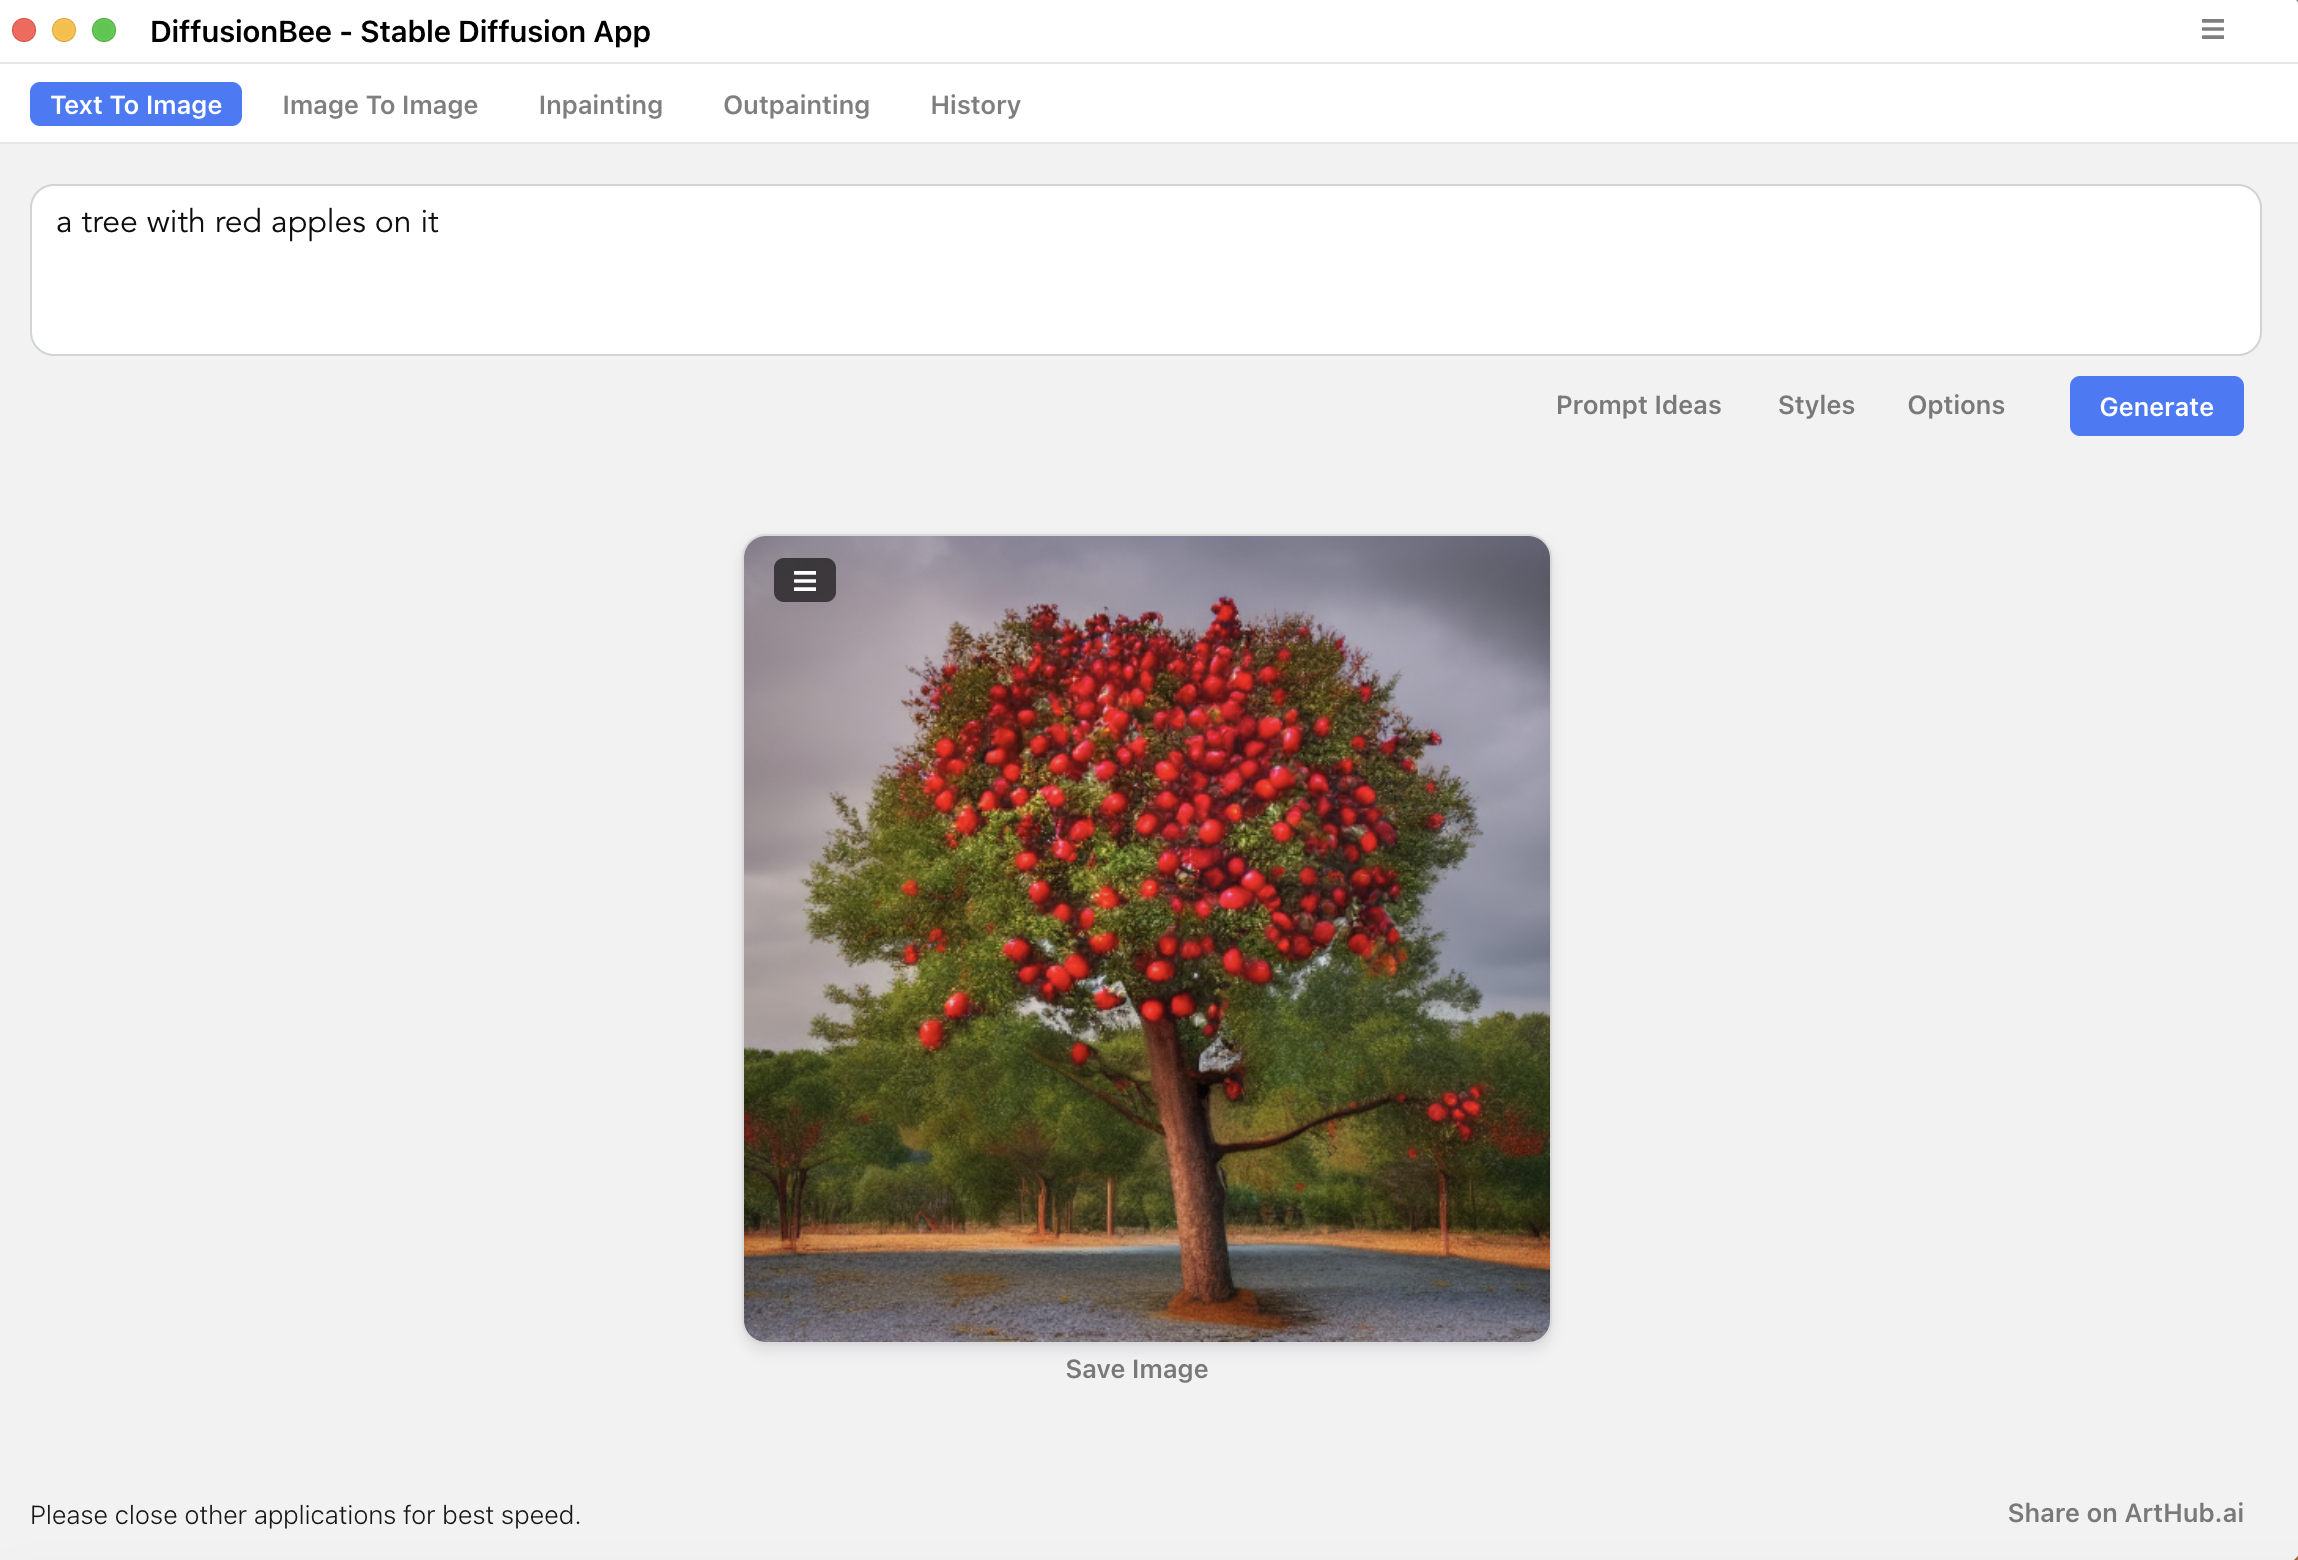
The text to image function is used to create an image based on text input only.
To create an image, simply enter a prompt and press generate.
- The Prompt ideas button opens a web page with a gallery for finding useful prompts.
- The Styles button provides a palette of often-used terms to add to the prompt.
- The Options buttons gives the following options:
- Num images: The number of images to generate.
- Image height/width: Sets the dimensions of the image. Note that Stable Diffusion is trained on 512 x 512 (the default setting). Other dimensions may give less good result and take more time.
- Steps: This corresponds to how many steps are used to build information about the image. Setting to a low number gives faster image generation, and may be useful while exploring different prompts.
- Batch size: This tells DiffusionBee to generate multiple images at a time. New batches of images will be created until “num images” have been created. (Just increasing num images is usually a better option.)
- Guidance scale: This kind of corresponds to how closely Stable Diffusion should stick to the prompt. Higher value means more strict interpretation.
- Seed: A number between 0 and 4,294,967,295 that is used as starting point for the image generation. If the same seed is used with the same prompt and the same settings (except steps, which may vary), the same image will be generated. If left empty, a random seed will be used.
Negative prompt
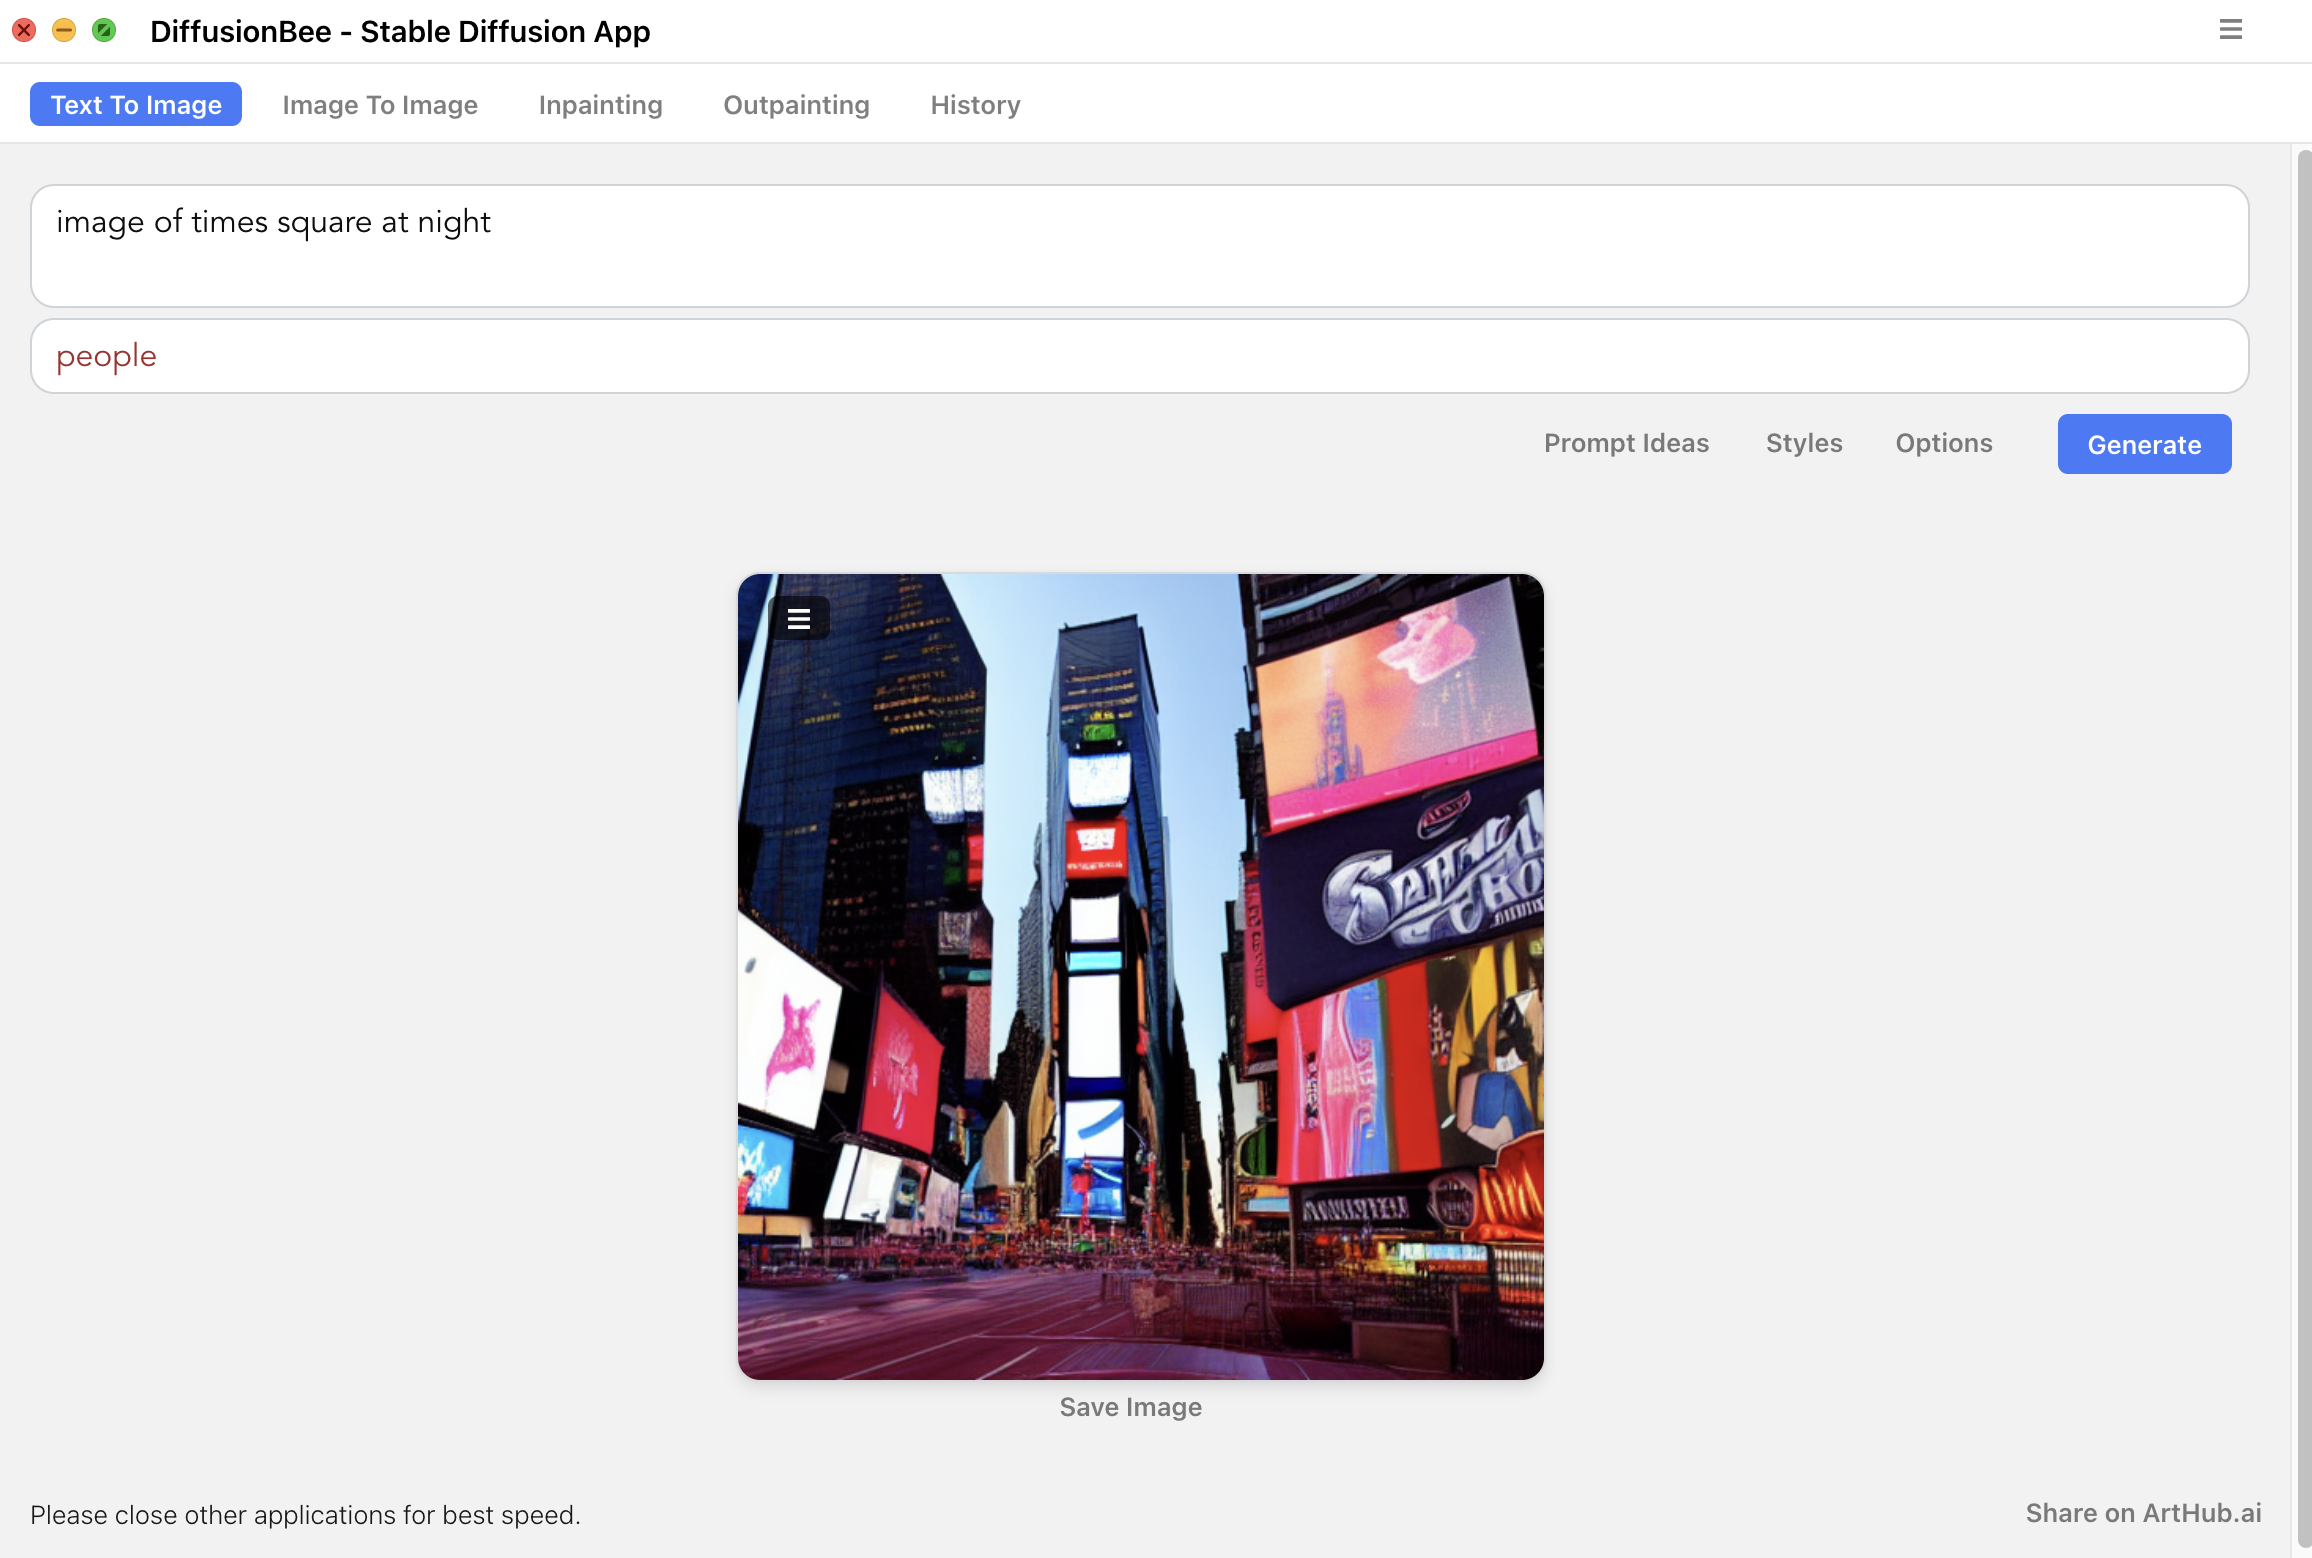
Enabling the negative prompt option allows adding descriptions of things to avoid including in the image, in combination with the standard prompt. As with the standard prompt the model’s understanding of the negative prompt is not perfect, so things described in the negative prompt may still occur in the image.
Image to image
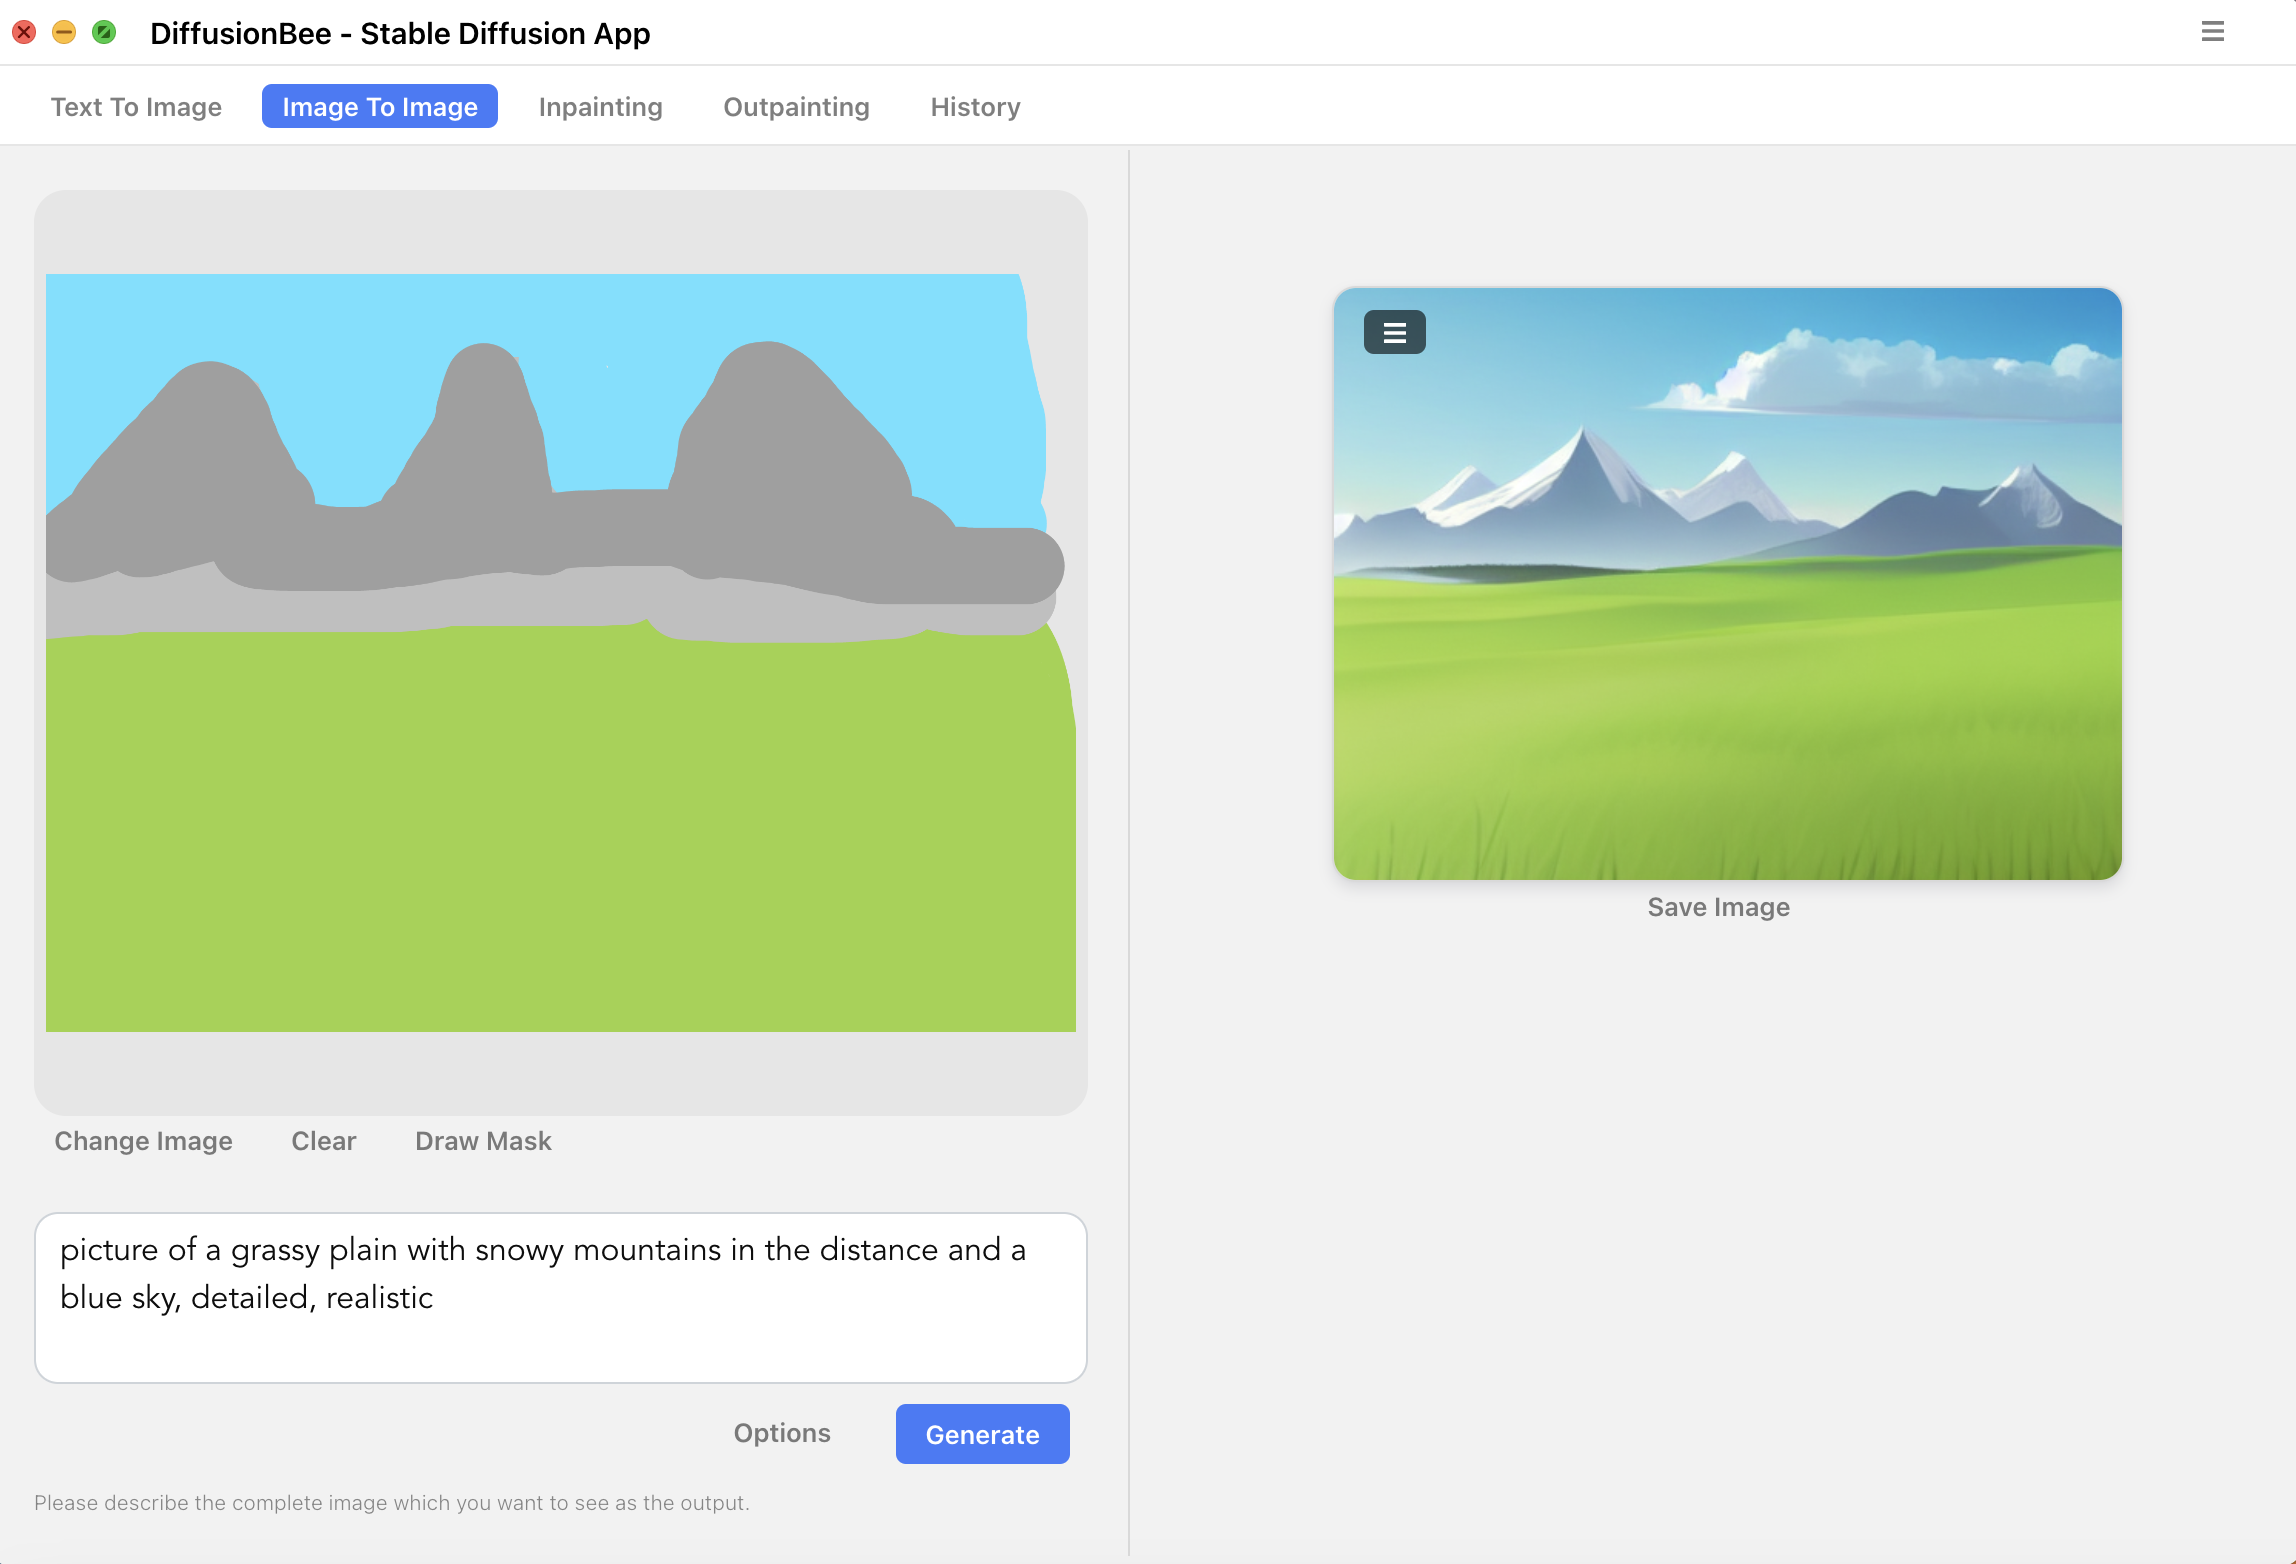
The image to image function can be used to create an image based on a starting image (often a very rough sketch) combined with a text description.
Click on the left pane to upload a sketch starting image (only png supported). Add a prompt description of the desired output and press generate. The generated image will be 512 x 512 pixels.
- The Options buttons gives the following options:
- Input strength: This tells DiffusionBee how closely to stick to the sketch input image. For rough sketches a low value usually works.
- Num images: The number of images to generate.
- Steps: This corresponds to how many steps are used to build the image information. Setting to a low number gives faster image generation, and may be useful while exploring different prompts.
- Seed: A number between 0 and 4,294,967,295 that is used as starting point for the image generation. If the same seed is used with the same image, the same prompt and the same settings (except steps, which may vary), the same image will be generated. If left empty, a random seed will be used.
Inpainting
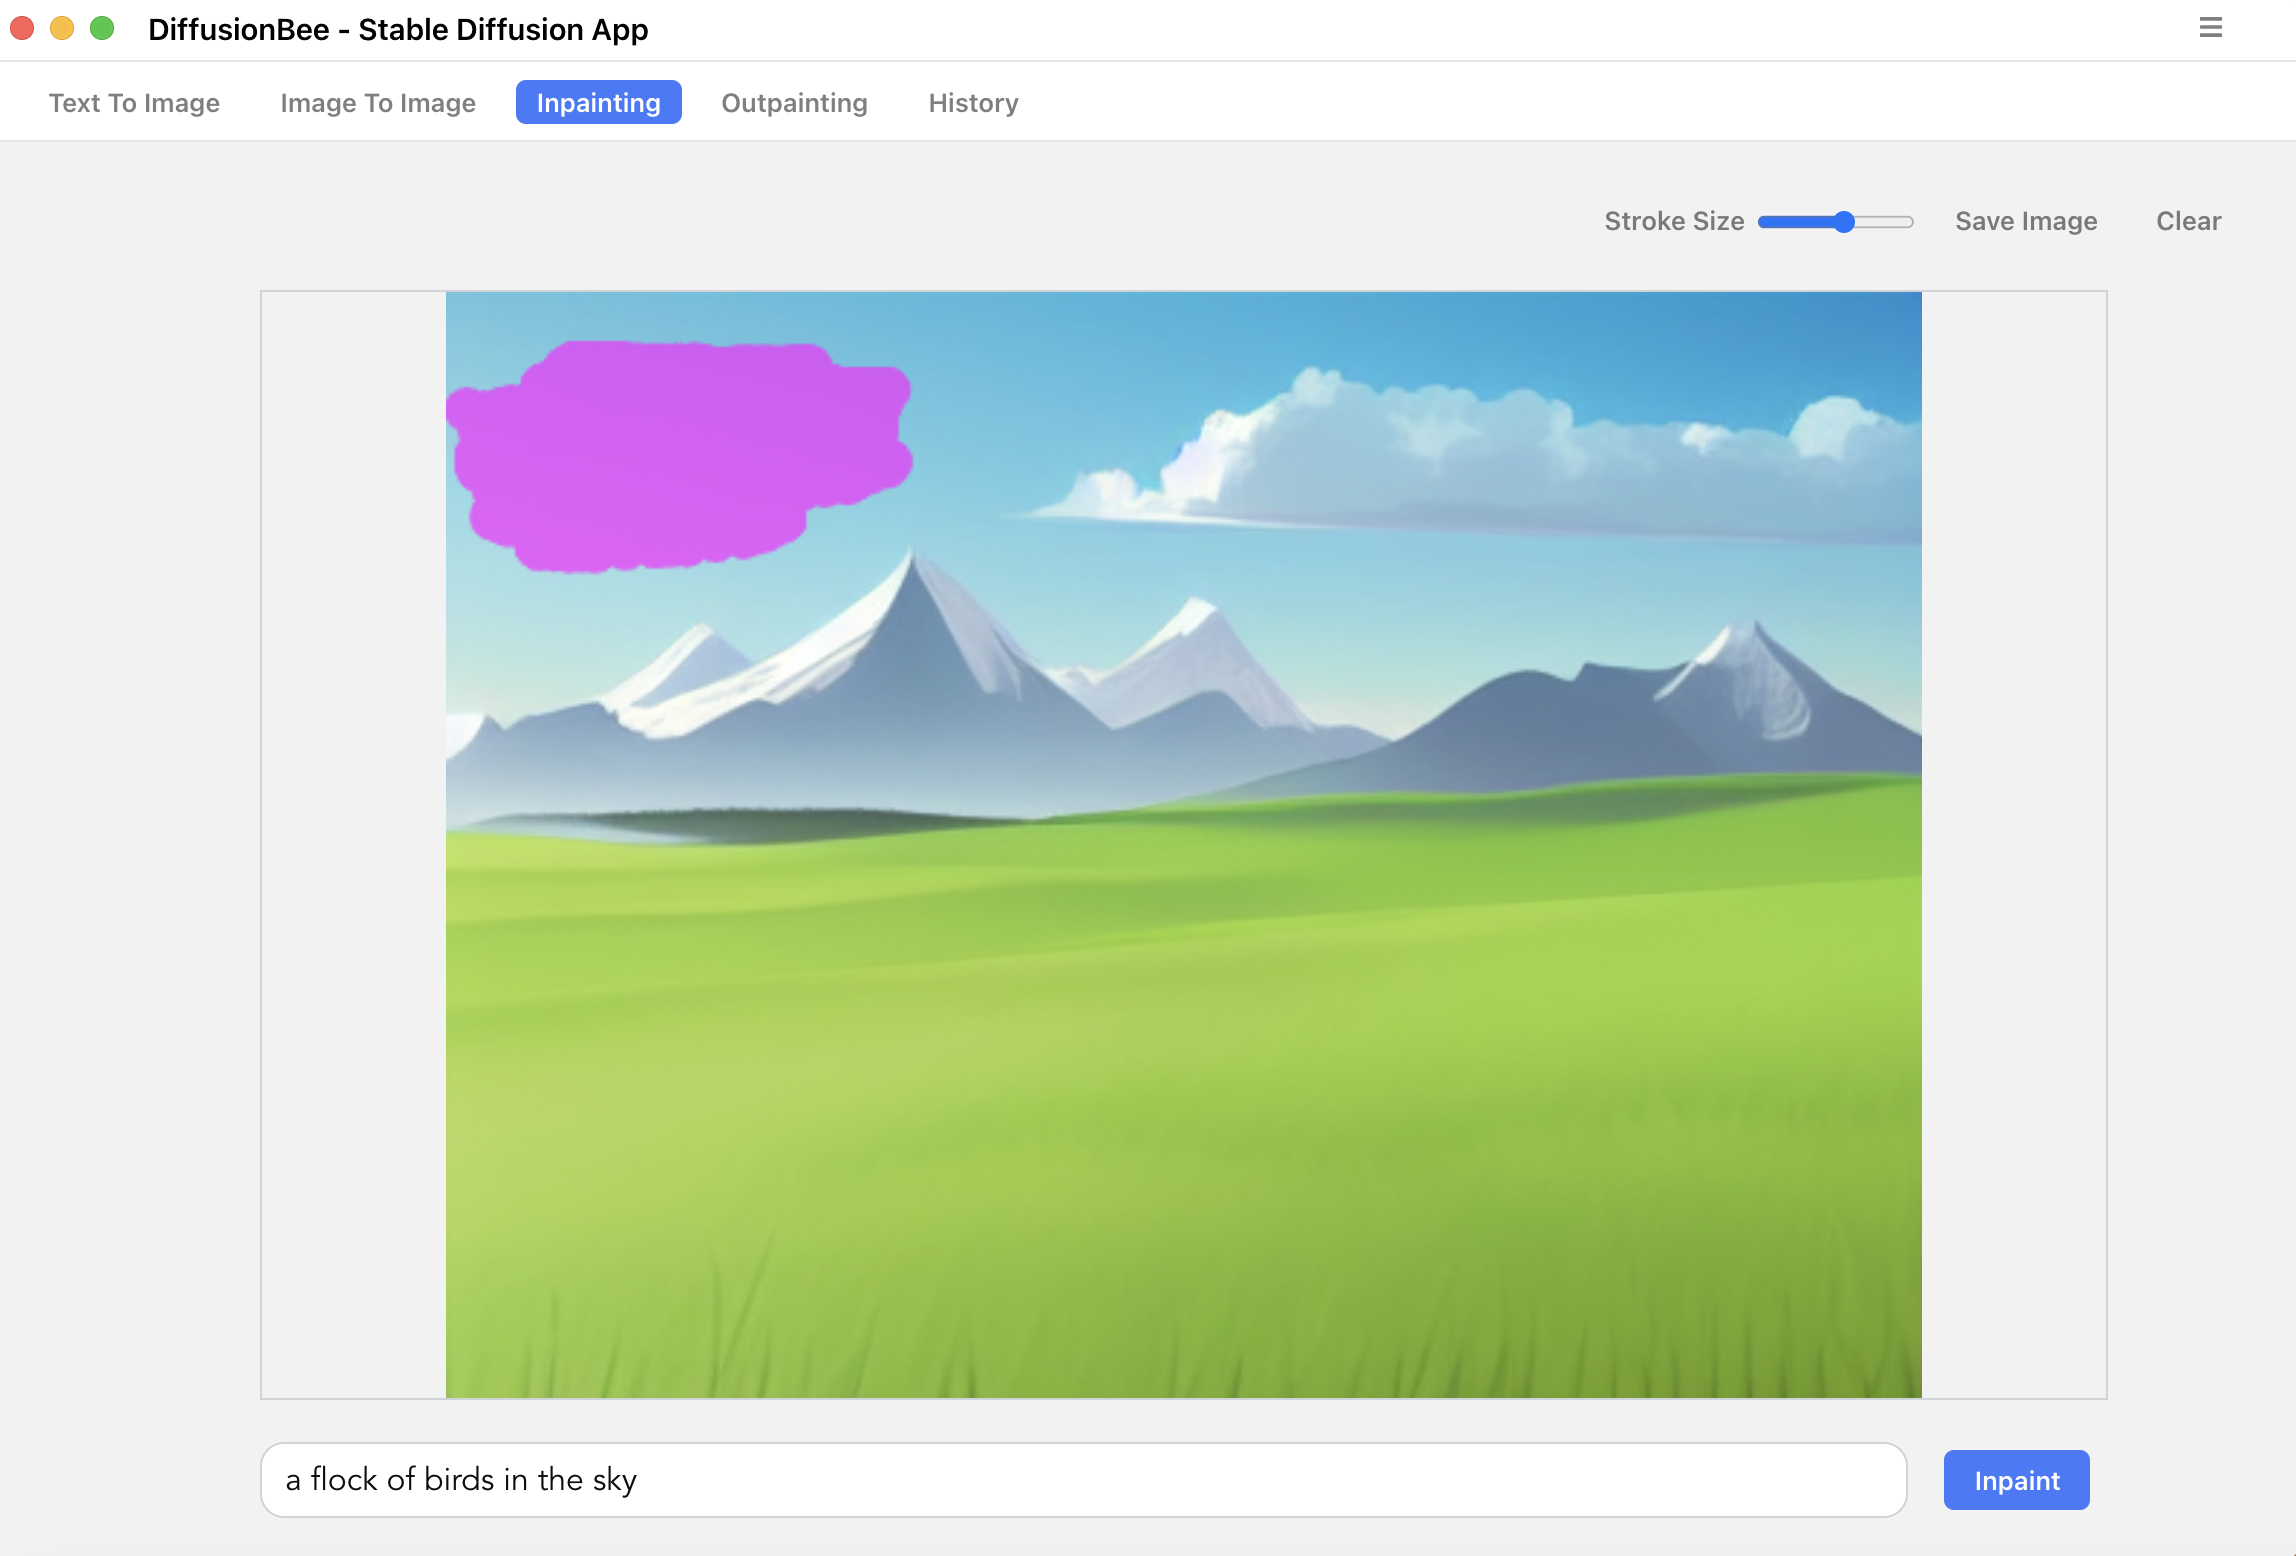
The inpainting function is used to replace/repaint parts of an image, for example to add a bow tie to a cat or removing a car from a photo of a street.
To use the inpainting functions, add an image and scribble on it to mask the area to re-paint. Masking a significantly larger area than the part that should change usually works better. Right now, the inpainting model works with a max height of 512 pixels, so any images bigger than that will be scaled down proportionally to fit the model.
Outpainting
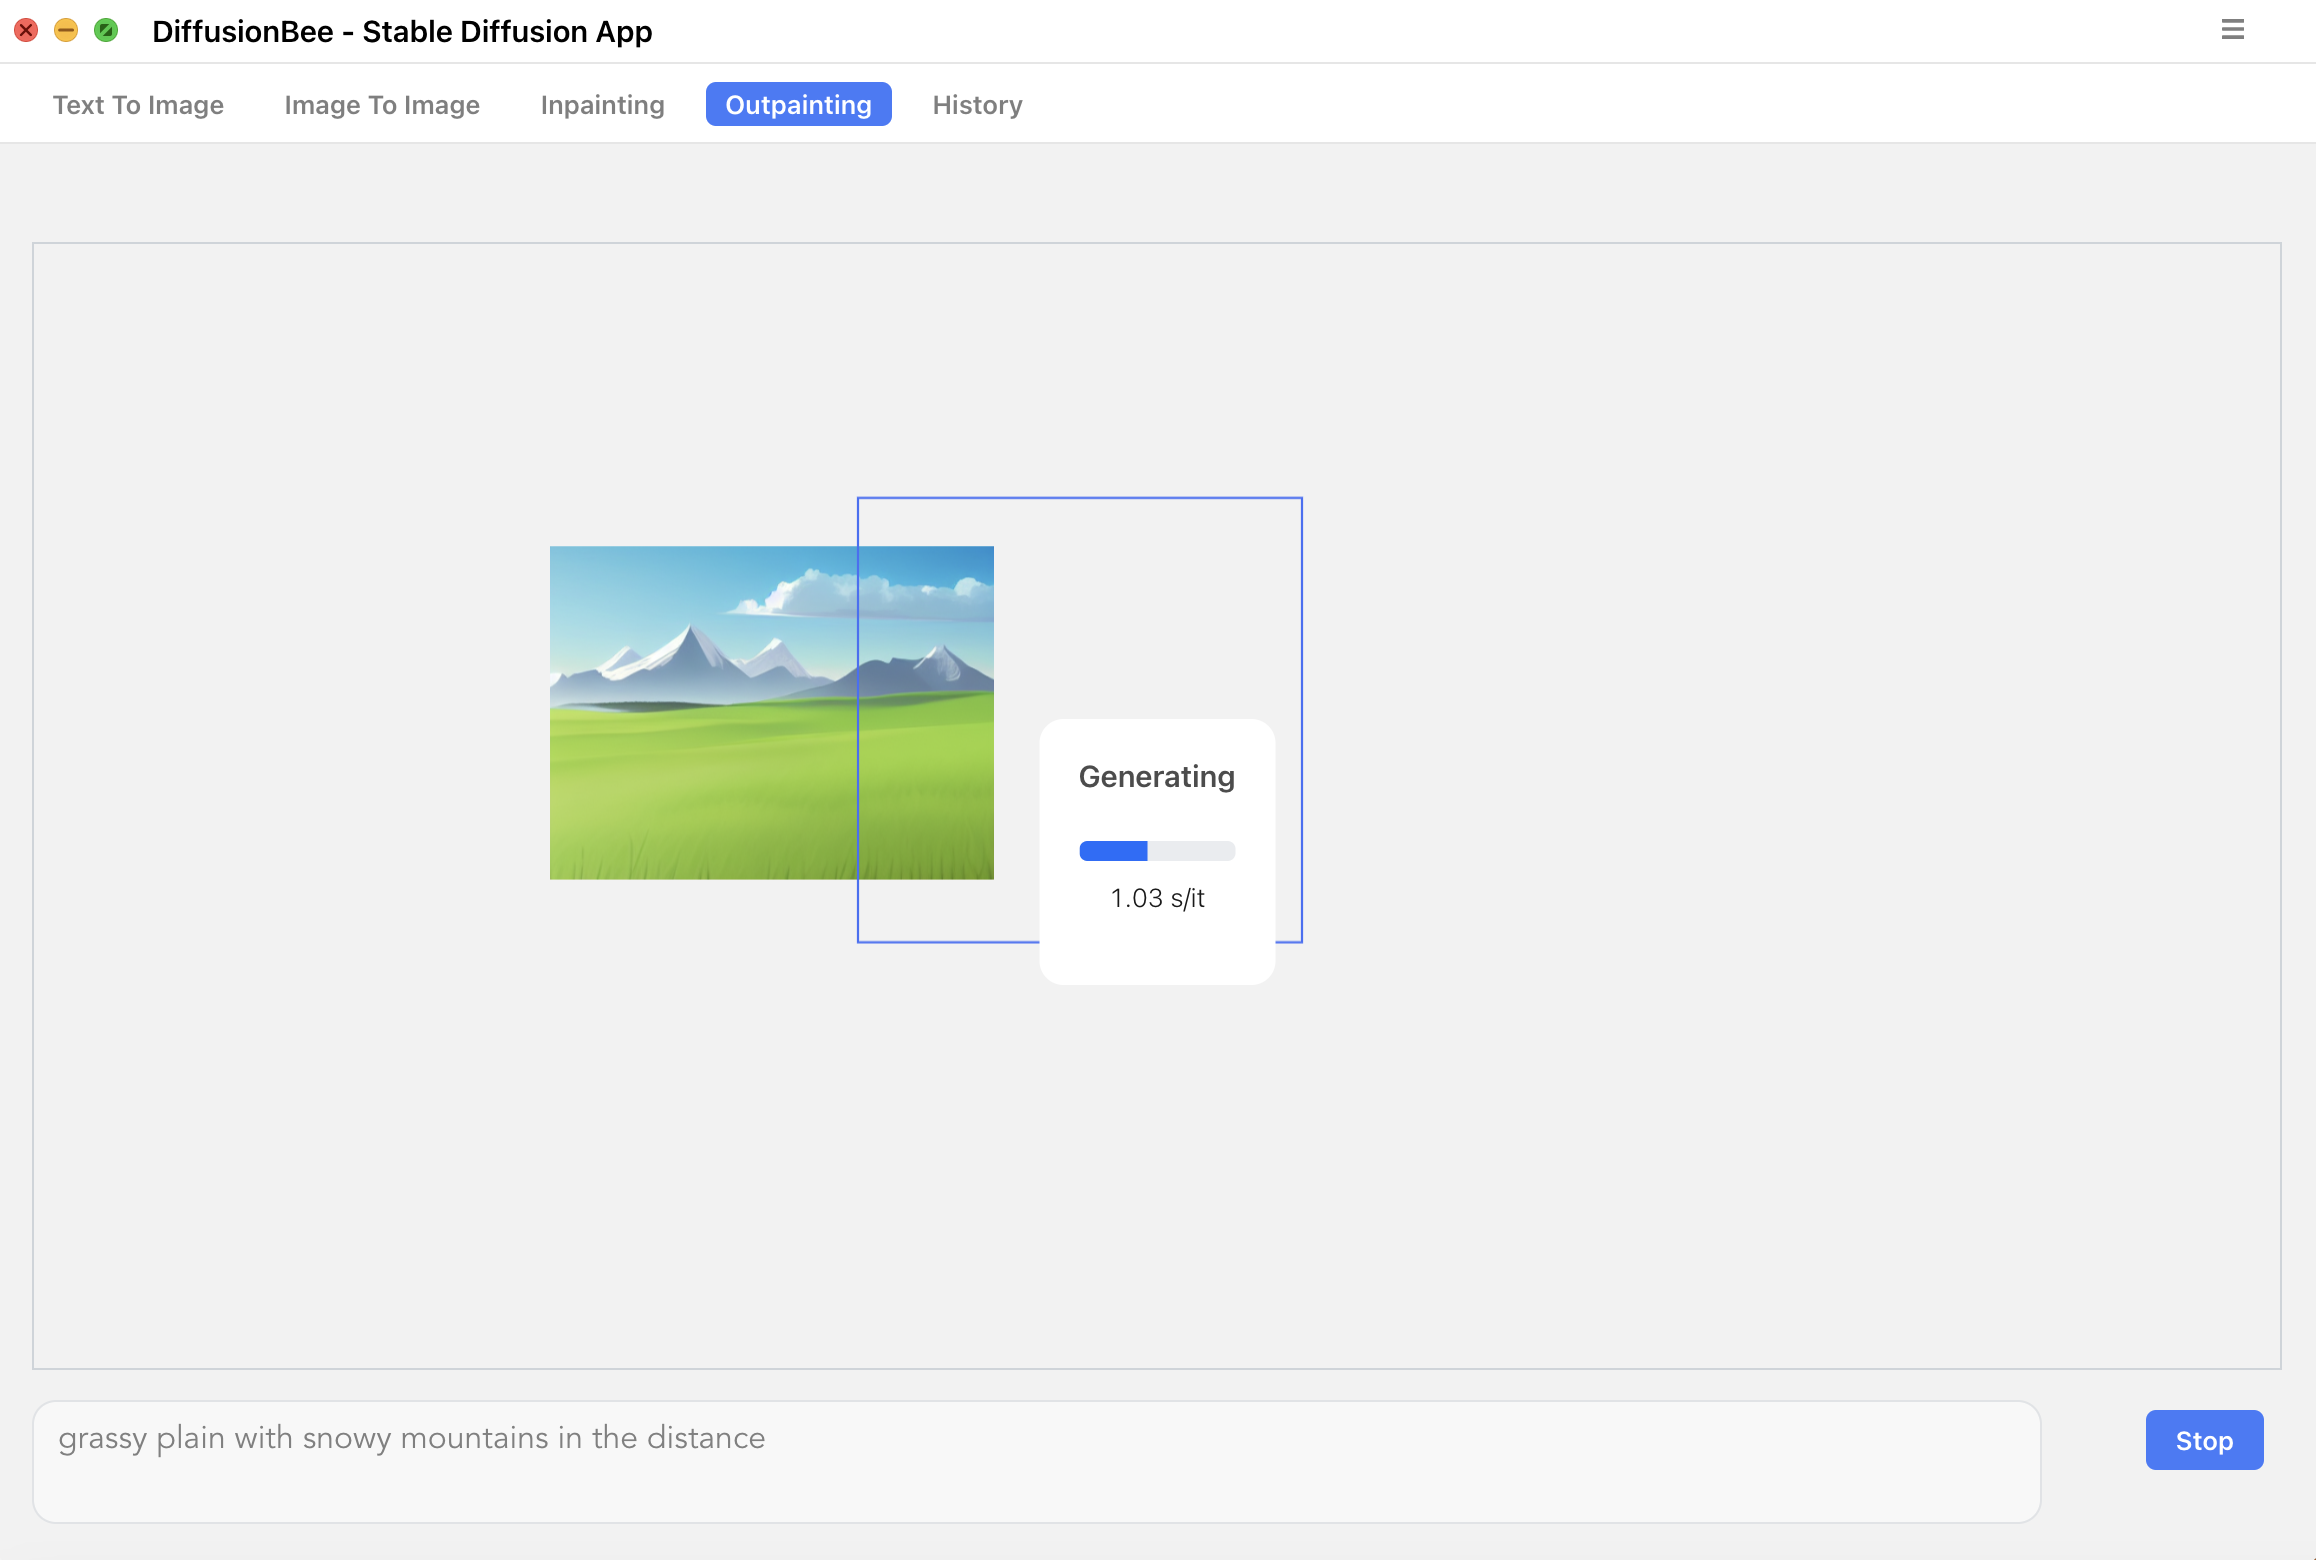
The outpainting function is used to expand an image to a larger area.
To use the outpainting functions, add an image and move the 512×512 frame to a place where the image should expand, and provide a text prompt. The process may be repeated to expand the image several times and in different directions.
History
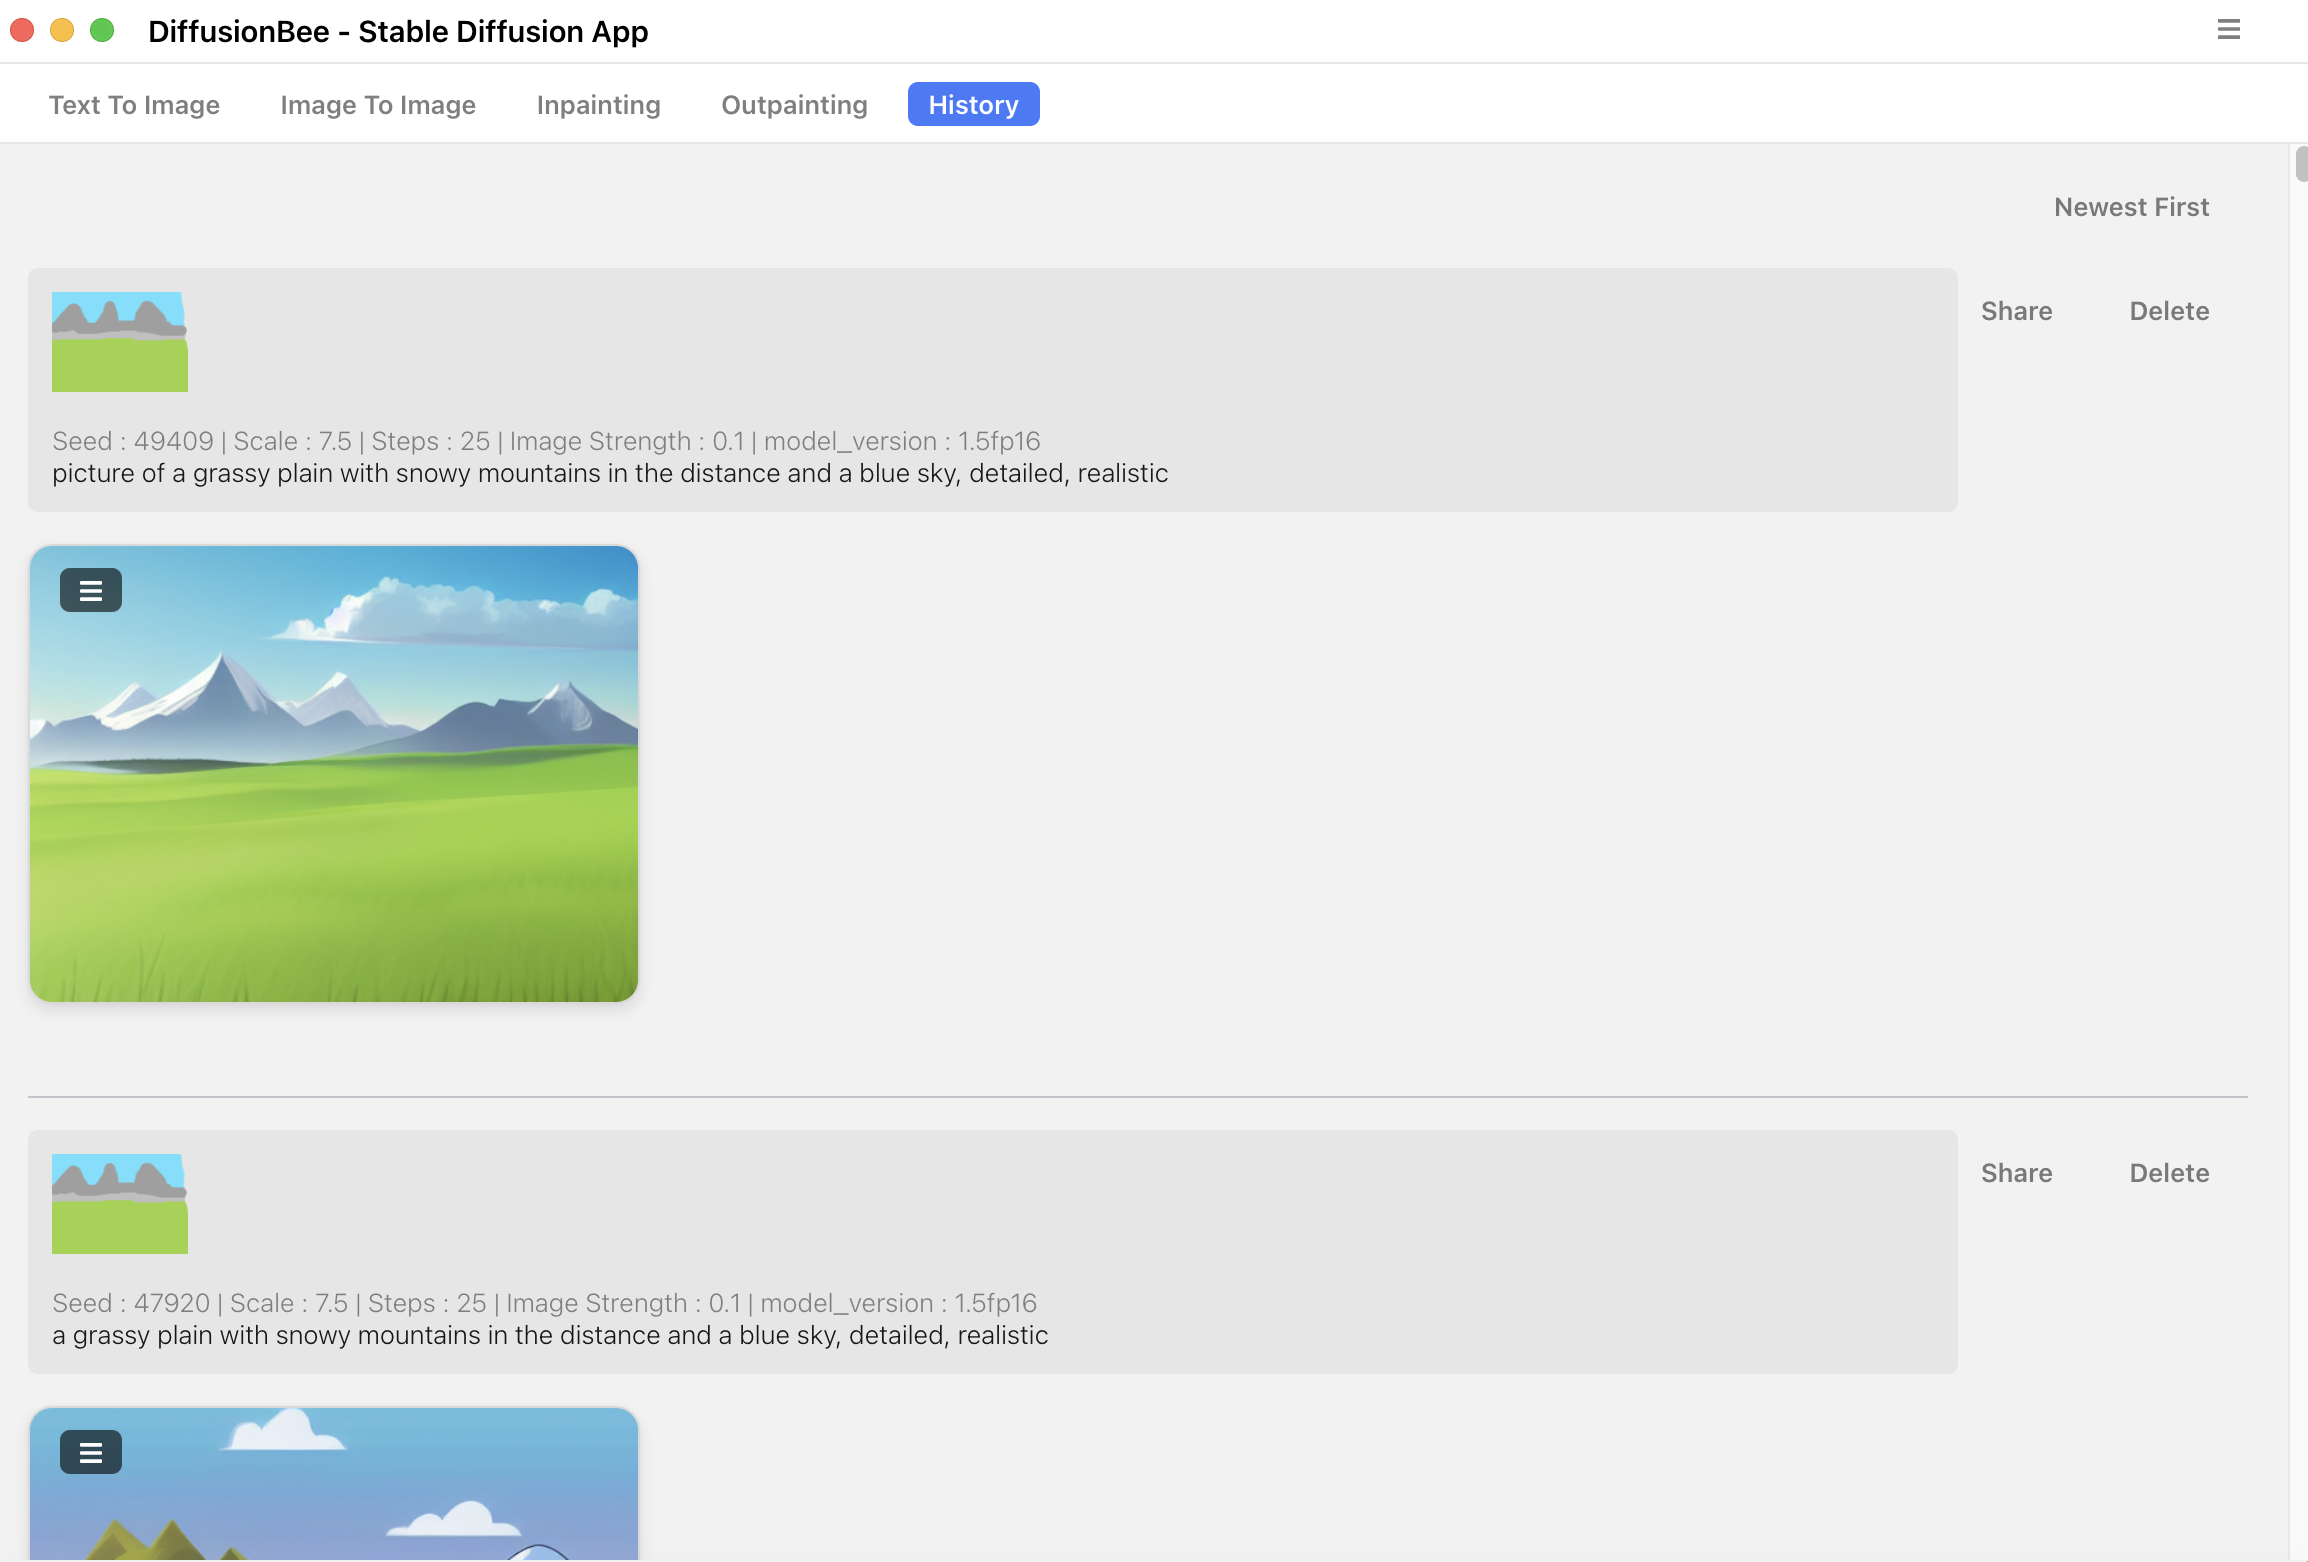
The History tab show previously generated images along with prompts and settings (including seed).
Sharing images
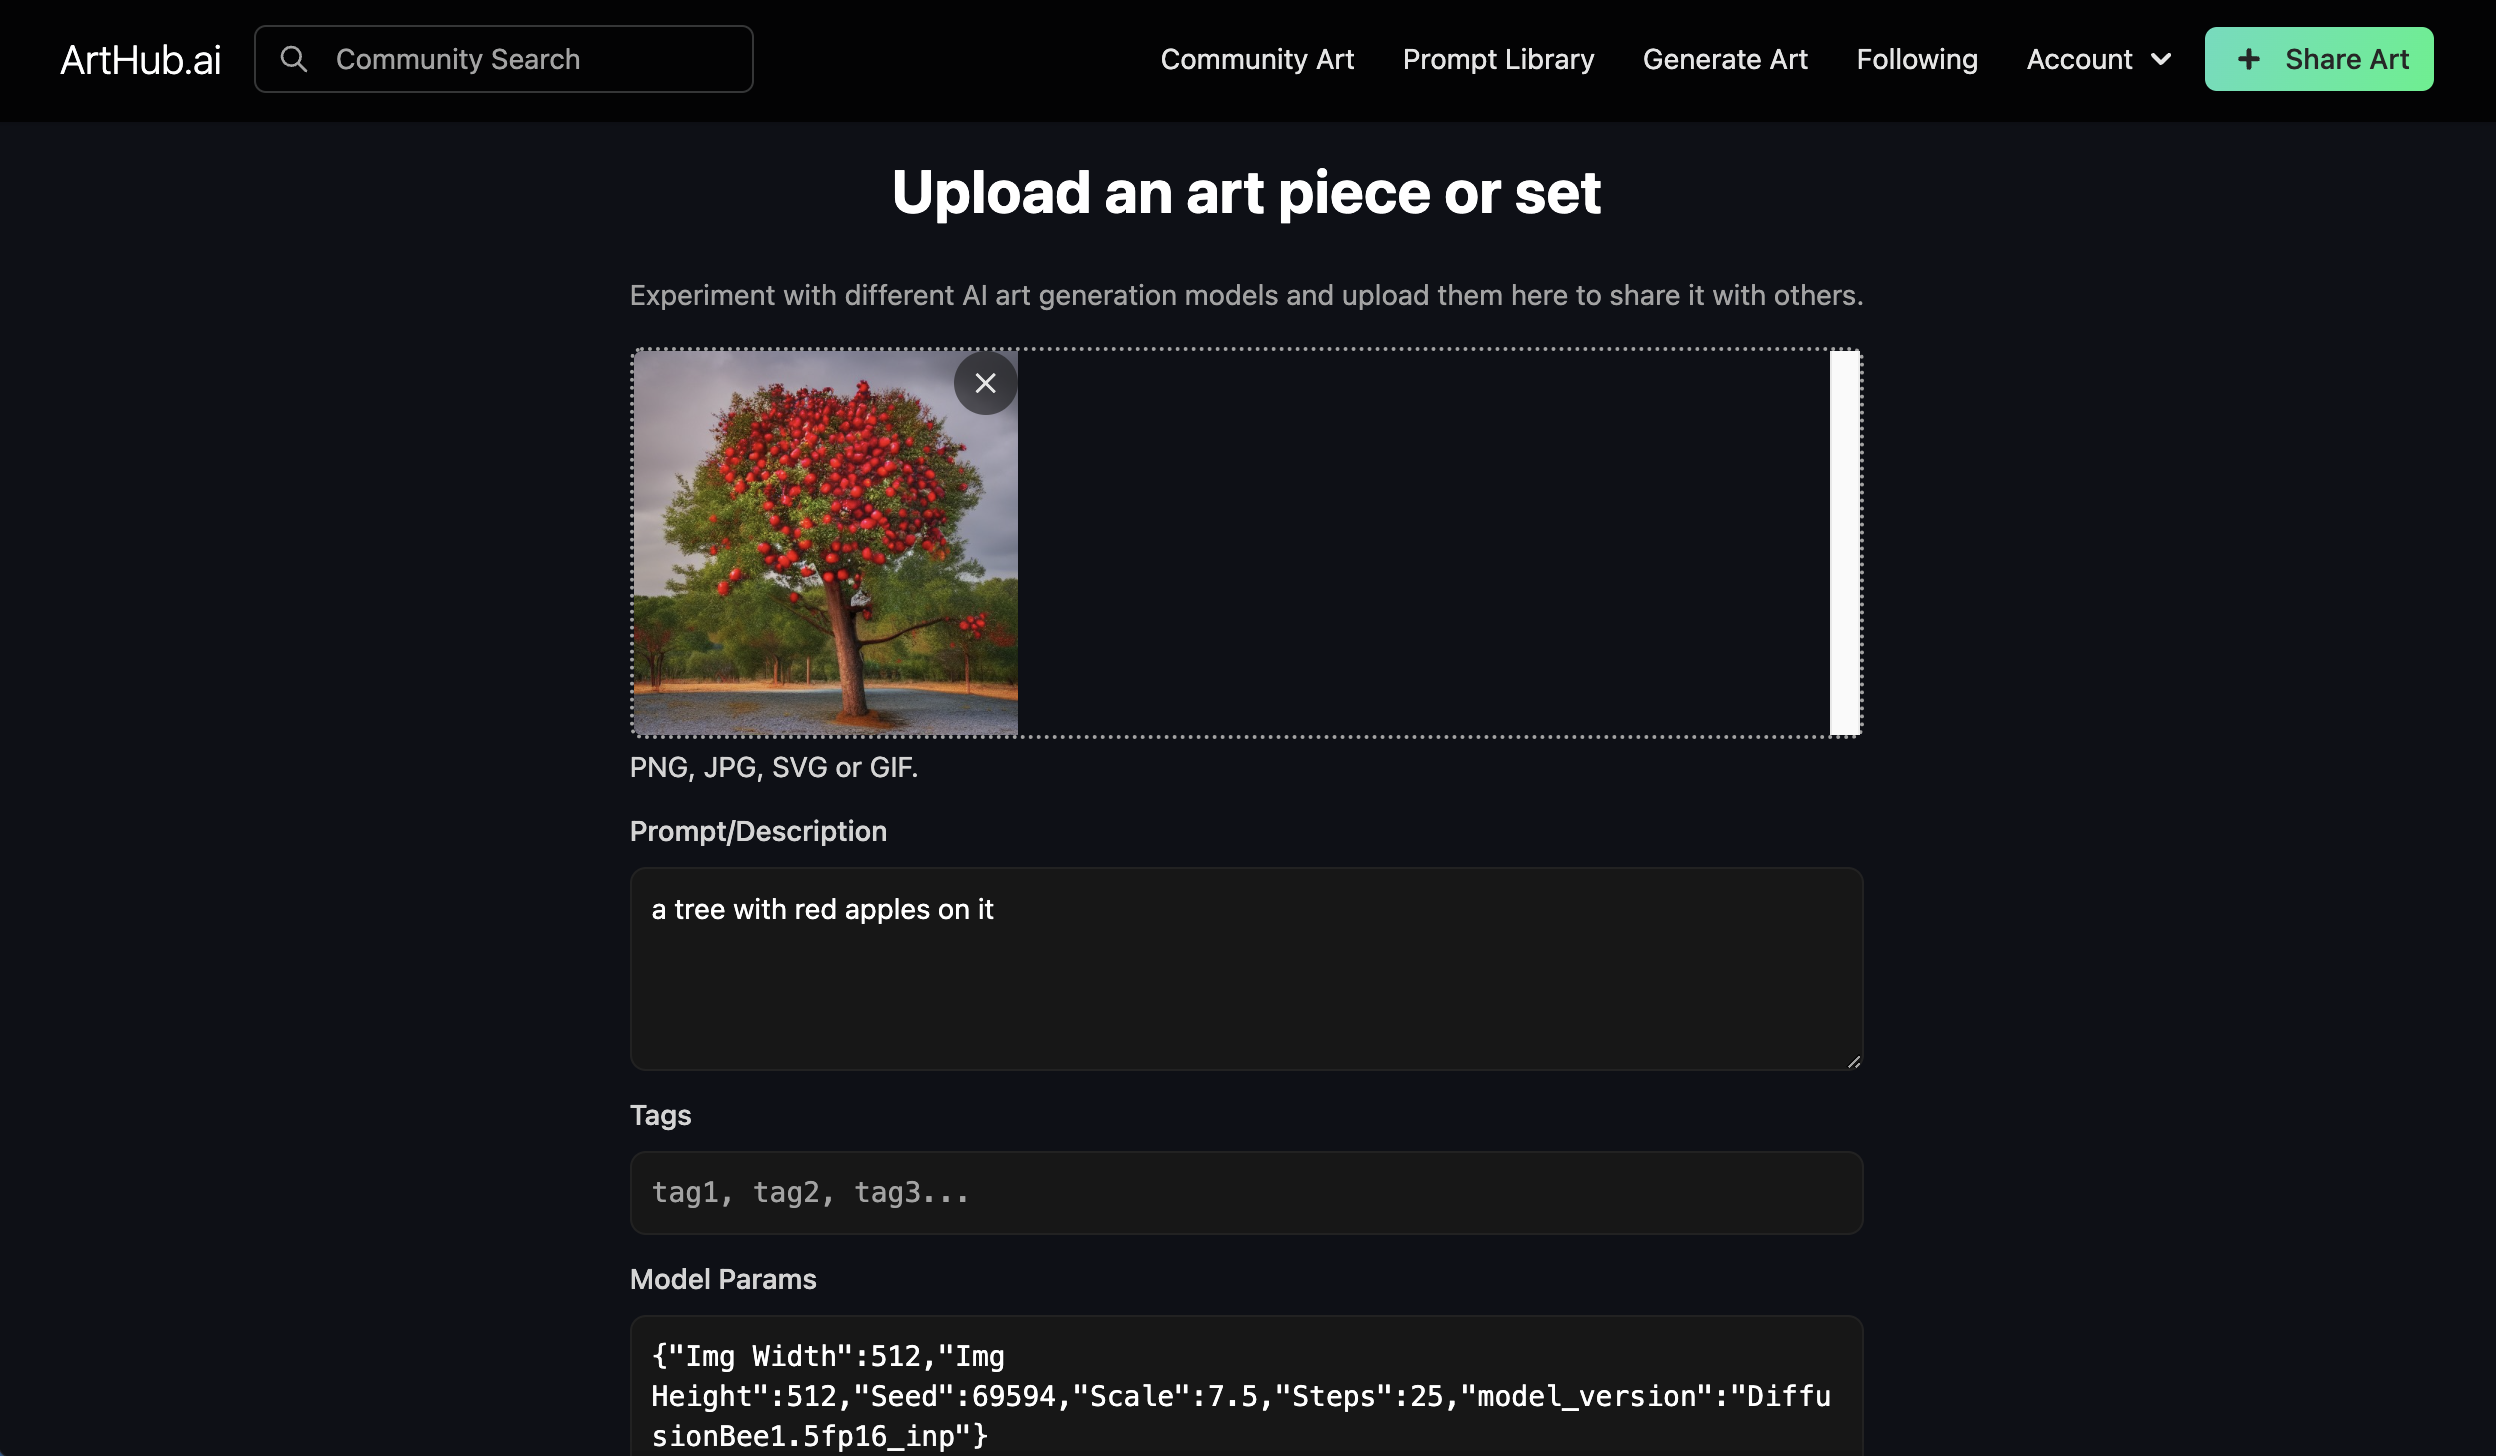
Sharing images uploads images along with prompt and settings to arthub.ai. Before uploading, pick which images in a batch to upload. Sharing requires an account.
Custom models
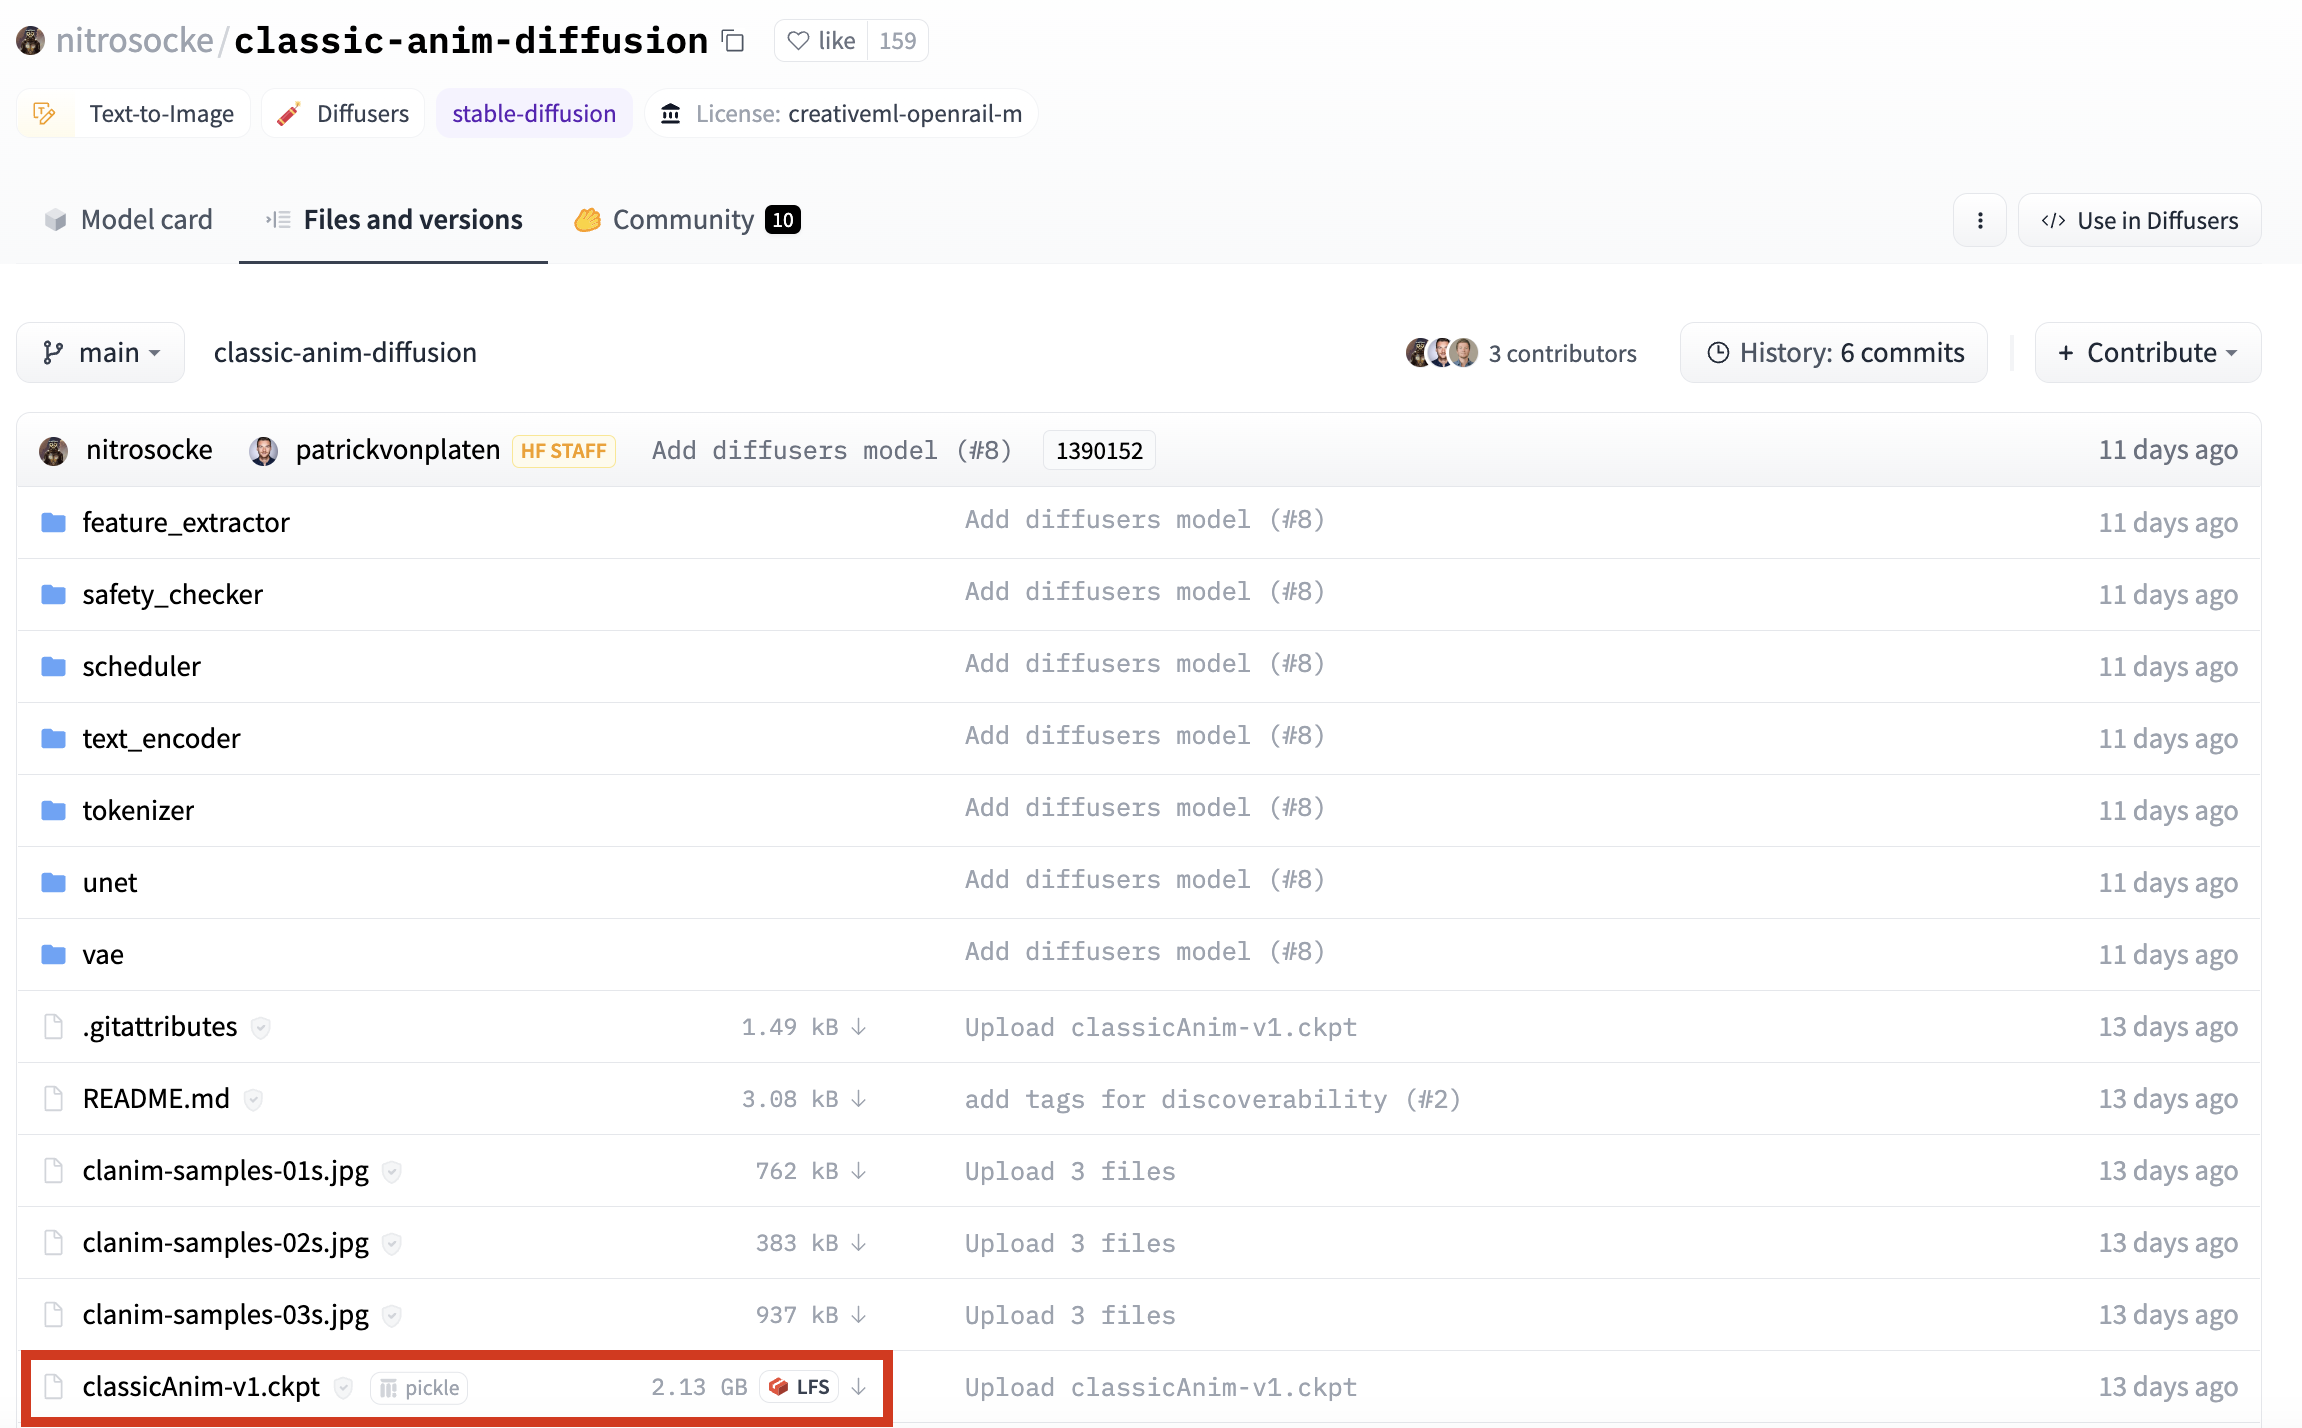
Diffusion Bee supports the ability to add and use custom models. Custom models are trained with specific images in order to create a certain style or type of image output. The best place to find custom models for DiffusionBee is Hugging Face. If using a model from Hugging Face, visit the model page and click the ‘files and versions’ tab. Then find and download the relevant .ckpt file.
Importing custom models
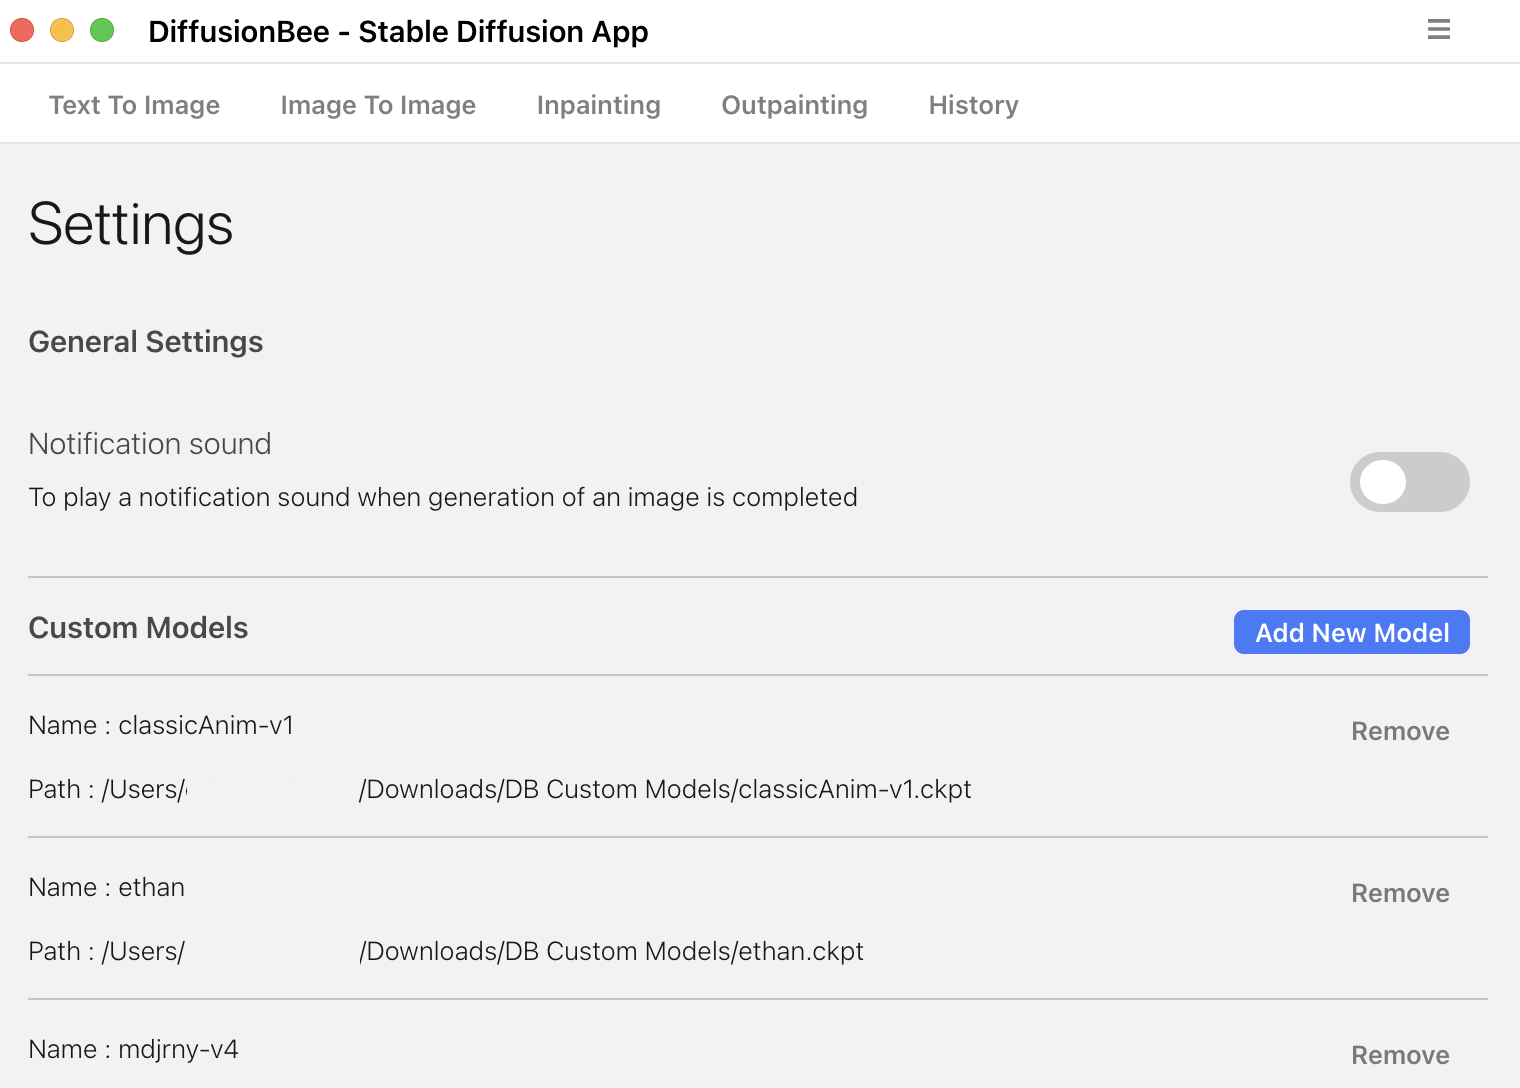
After downloading the .ckpt file of the model, import it into DiffusionBee. To do so, open DiffusionBee and click on the menu icon located on the top right. Click settings from the dropdown list, and click ‘add new model’. Navigate to the model file, click on it, and click open.
Using custom models
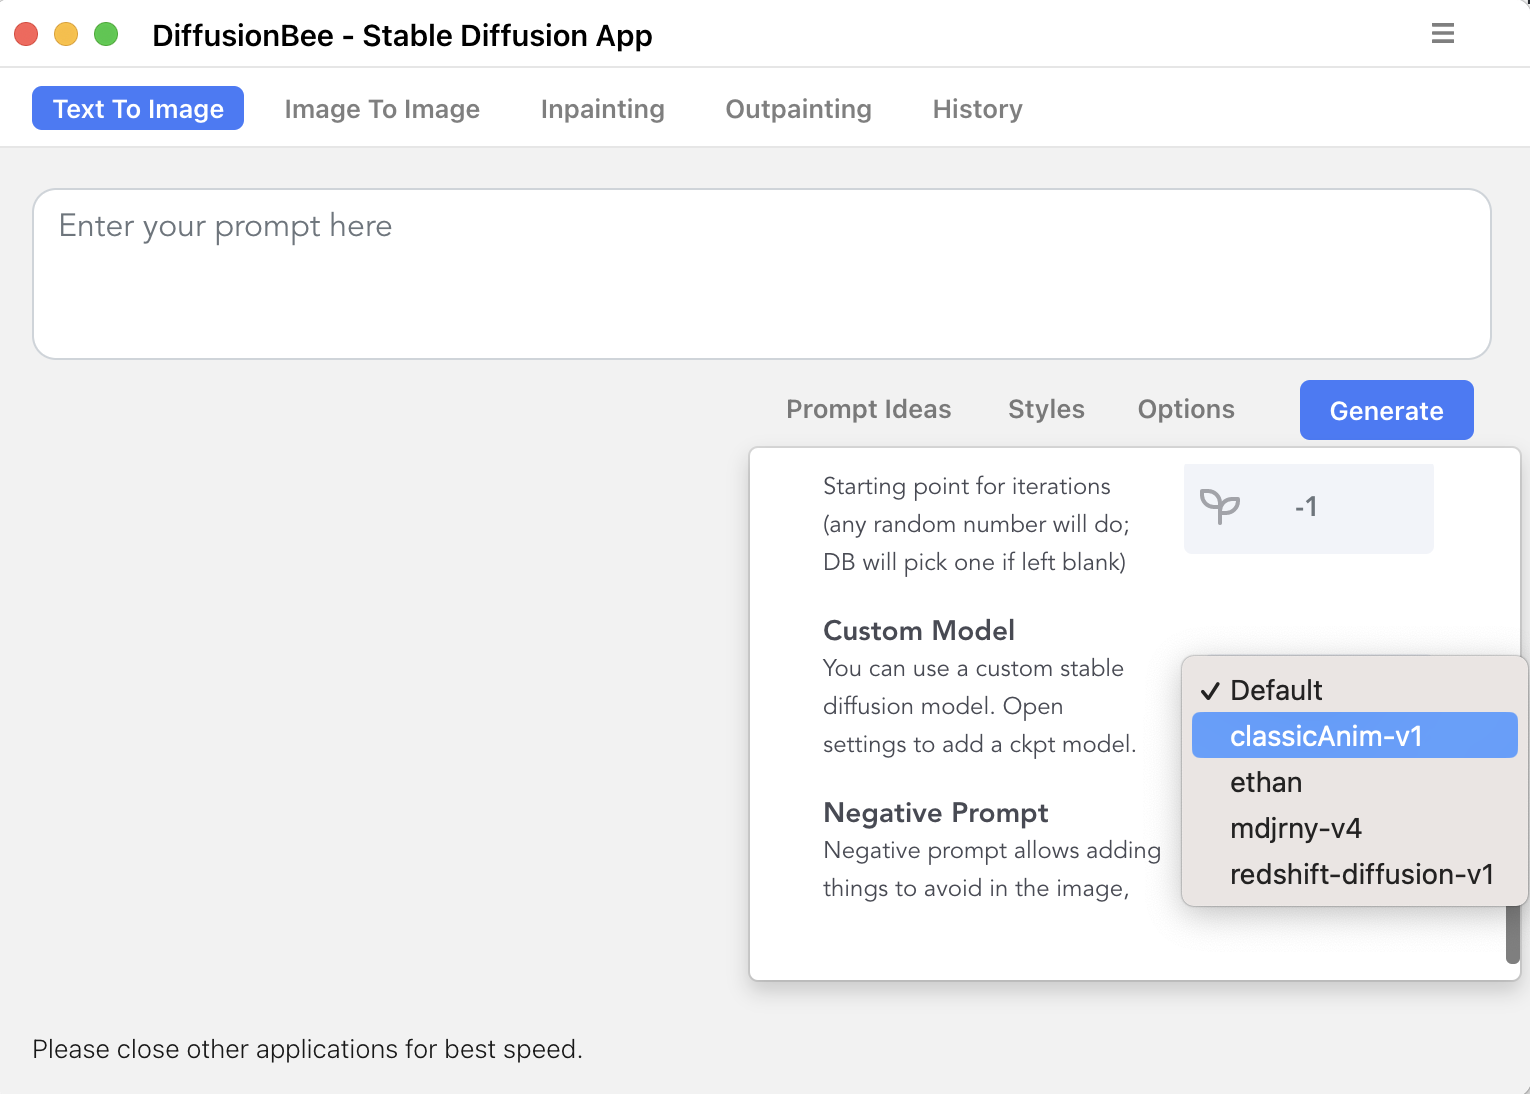
After importing a custom model, it is available when generating images. First, click options and scroll down to the custom model section. Clicking on the icon will display a dropdown of all the available models. Choose the model to use.
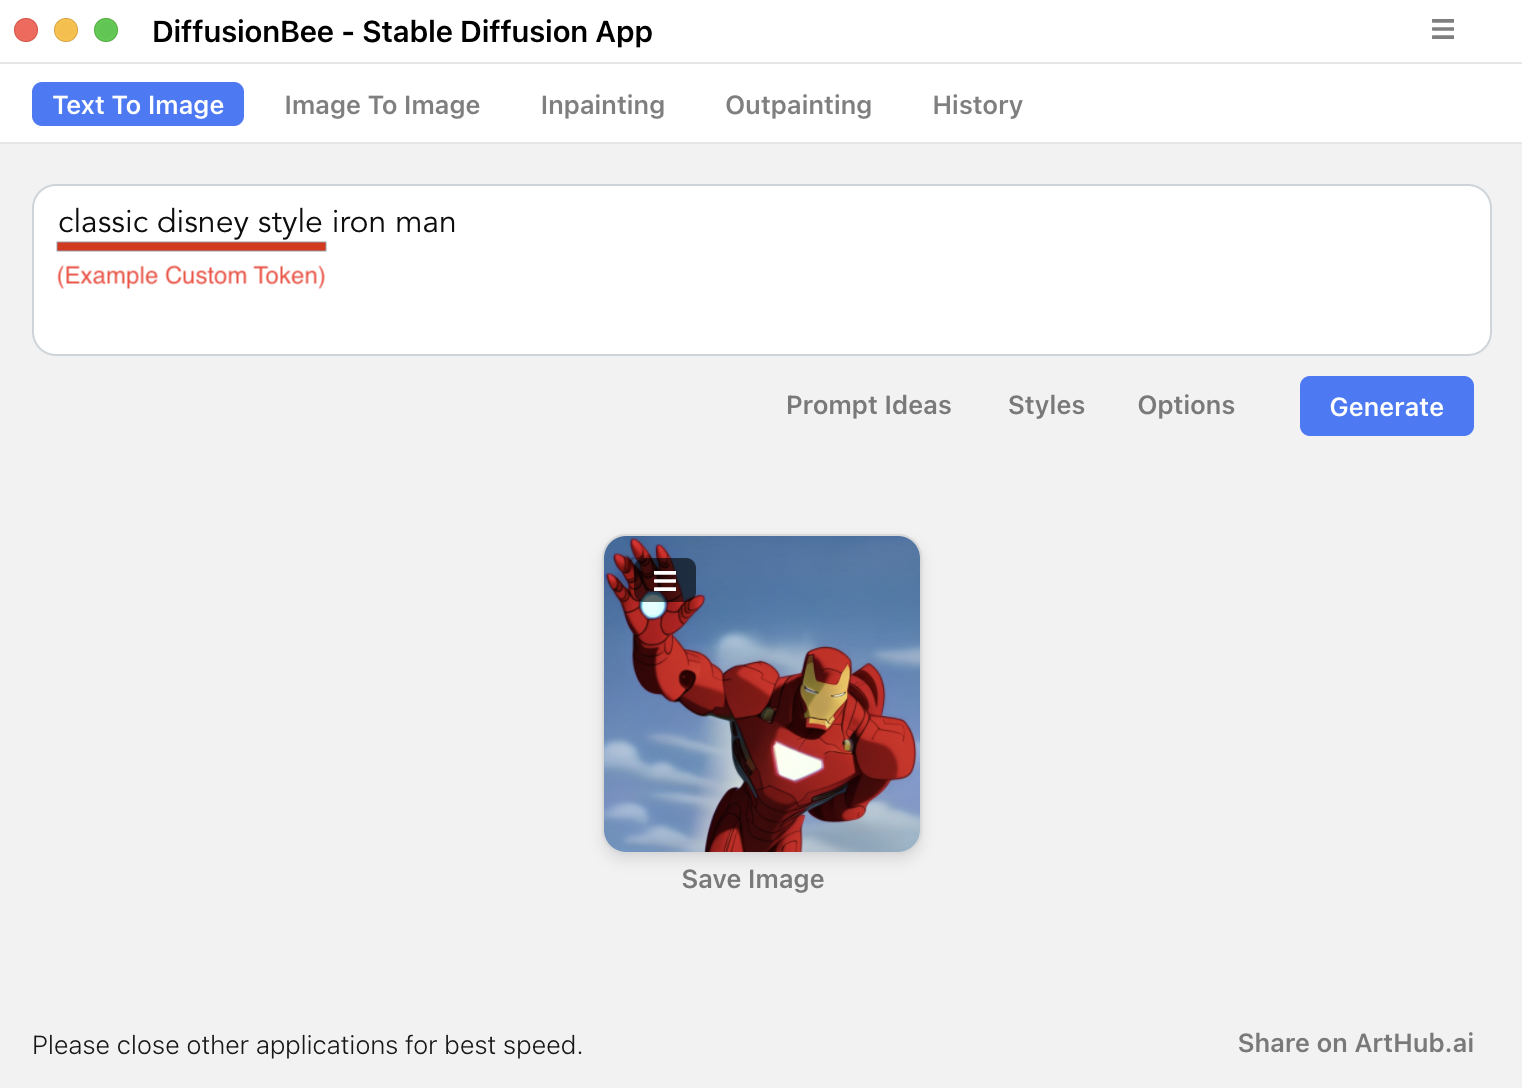
When generating images with a custom model, make sure to use the custom token in order to get the desired result. The required prompt/ other important information is most likely disclosed on the info page of the model.
Removing DiffusionBee
Removing the application itself
Drag and drop the DiffusionBee.app application to the Trash.
Removing leftover files
DiffusionBee saves generated images and imported custom-model info in the home folder, under .diffusionbee/. A full uninstall can delete the whole folder. There are two ways to do it:
From the Terminal
Open the Terminal.app application (located in /Applications/Utilities/), and enter the command:
rm -r ~/.diffusionbee/This will remove all traces of the DiffusionBee application (cache, generated images, imported models…).
From the Finder
Open the Home folder, press cmd + shift + . (command + shift + period) to show hidden files. The .diffusionbee folder can go to Trash.
Extra tips
- For prompt ideas and help, check out:
- lexica.art
- arthub.ai
Prompt Engineeringsection at AssemblyAI
- Image generation requires a substantial amount of system memory. Close other applications for a faster generation.
- Save time while tuning prompts by lowering the steps setting, then turning it back up once a good prompt is found.
- When tuning prompts, enter a seed so images can be recreated. Generating more than one image per seed (Num Images or Batch) loses correspondence after the first. Example: Num Images 3, seed 1000 — only the first image maps to 1000; the other two seeds are unknown.
- When num images is set to more than 1,
1234is added to the seed for each image following the first one. Therefore, the formula to calculate the seed of the $n^{th}$ image in a batch is the following: $seed(n) = seed + (n\times{1234})$. This can be used to recreate any number in a string of images without having to recreate all the previous ones. - All created images are stored at
~/.diffusionbee/images/in your file system. There is no interface in DiffusionBee for deleting images, but they can be deleted manually from this hidden directory. - The model is stored at
~/.diffusionbee/downloads. If a model already exists and should not be re-downloaded, move, copy or symlink it to that directory. - The Show logs menu option shows logs that are mostly useful for developers or for tracking errors. Leave the log by clicking one of the tabs.
Requirements
- Mac with Intel or M1/M2/M3 CPU
- For Intel : MacOS 12.3.1 or later
- For M1/M2/M3 : MacOS 11.0.0 or later
FAQs
Where are the images generated?
Images are generated locally on your computer. Nothing is sent to the cloud.
How much time does it take to generate an image?
On 8GB M1 MacBook Air, DiffusionBee takes around 30 seconds to generate an image. The speeds are much higher on computers with higher specs.
Can generated images be used freely?
Yes, if the CreativeML Open RAIL-M license is followed.
Does DiffusionBee work with Intel based machines?
Yes, DiffusionBee works with Intel based machines. Without a dedicated graphics chip it is much slower than an M1 machine.
References
- Diffusion Bee
- Stable Diffusion